Integration with the Present Backend
After the Present package has been installed in the org, it must be connected to the Present backend, as well as allow the backend to talk to the org.
First of all, to connect to the Present backend, an AuthProvider must be set up.
Allowing your org to connect to the Present Backend
Remote Site Settings:
- Go to Remote Site Settings in Setup
- Create a new remote site setting for the provided token endpoint URL for the Present Backend
- Create a new remote site setting for the provided API endpoint URL for the Present Backend.
Setting up authentication to the Backend:
- Go to Auth. Providers in Setup.
- Create a new Auth. Provider by selecting the provider type
PresentAuthProvider - Fill out the fields of the Auth. Provider with the details received from us. (For the execution user, use a system user that has the Manage Users permission.)
Execution user MUST have an active Present license
In a Production salesforce org, the execution user must have an active Present license, as the user will be responsible for uploading the created slide decks from the Present backend to the org. This is not necessary in a sandbox org.
- Go to Named Credentials in Setup
- Create a new (Legacy) Named Credential
- Name it
bookme_present - Set the URL to the URL received from us.
- Set
Identity TypeasNamed Principal - Set
Authentication ProtocolasOAuth 2.0 - Set the
Authentication Providerto the recently createdPresentAuthProvider - Click “save”, and if everything went well, you are now connected to the present backend.
Allowing the Present Backend to login into your org
To allow the Backend to upload the created slide decks etc. The backend needs access to the org.
- Go to App Manager in Setup
- Create a new Connected App with the relevant information
- Select Enable OAuth Settings
- For the callback URL, enter http://localhost:1717/OauthRedirect
- Select Use digital signatures
- Click Choose File and uploaded the certificate provided by &money.
- Add the OAuth scopes below and save
- Manage user data via APIs (API)
- Manage user data via Web browsers (web)
- Perform requests at any time (refresh_token, offline_access)
- Click Manage on the connected app
- Click Edit policies
- In the OAuth Policies section, select Admin approved users are pre-authorized for permitted users, and click Ok and Save
- Add the Profiles or Permission Sets that are allowed to use the connected app.
- IMPORTANT - finally, look up the consumer details for the connected app.
- These must be sent to &money, as well as the username of an integration user that has access to the connected app.
- This integration user will be responsible for uploading the created slide decks from the Present backend to the org.
- Therefore, the integration user must have the Present permission sets assigned.
- To verify the connected app, the following commands can be run, to try and authorize using sfdx:
- “sfdx auth:jwt:grant –clientid {connected-app-client-id} –jwtkeyfile {certificate-private-key.key} –username {integration-username} –setdefaultdevhubusername –setalias my-hub-org
- If you want to connect to something not hosted on https://login.salesforce.com, then you can use the “—instanceurl” parameter.
New Present connection setup
A new simplified setup for present has been implemented, making it possible to set up automatic connection between a Salesforce org through the Management UI.
First, connection from our backend to Salesforce must be configured, as that allows automated provisioning of connection from the org to the backend. If the respective bank that is being configured is on BookMe package version 1.14 or above, a new External Client App is included, which replaces the Connect App setup.
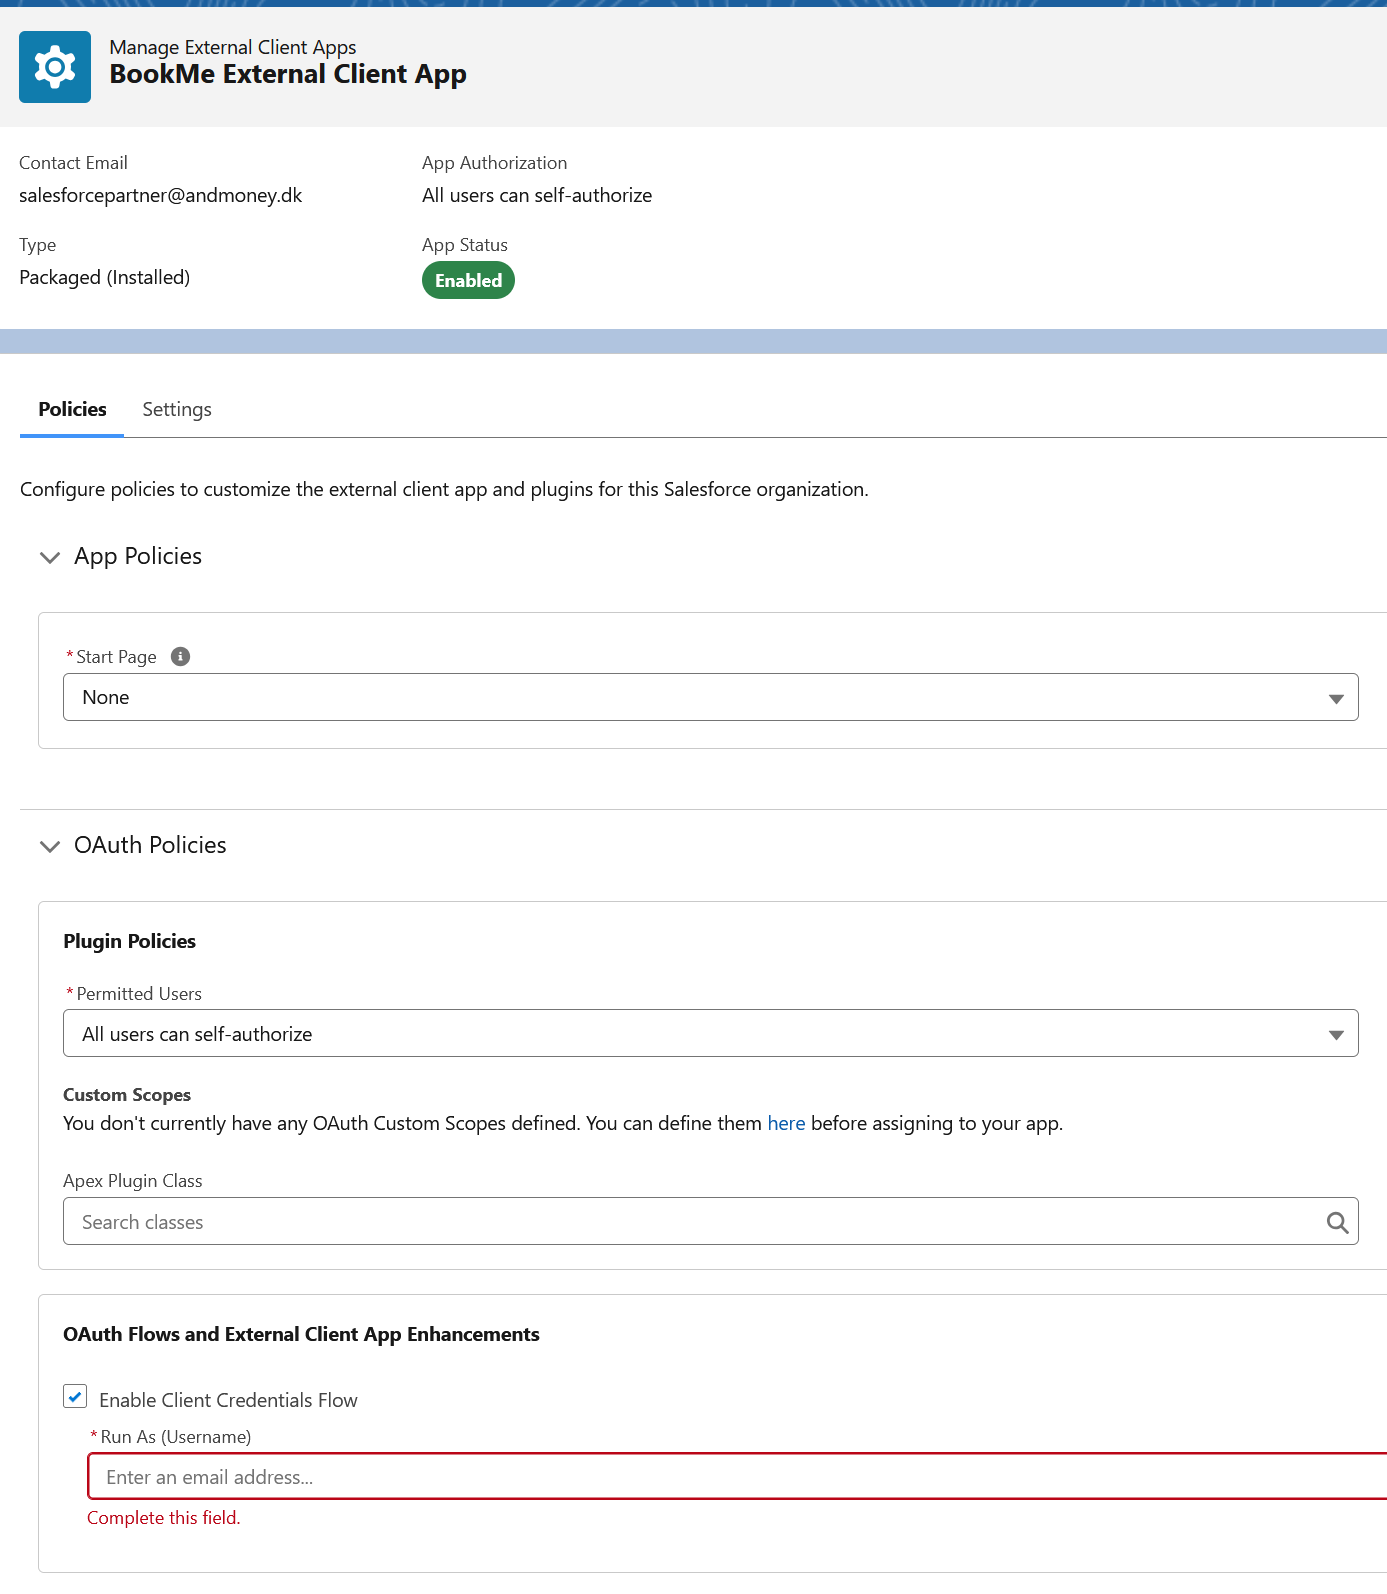
Navigate to the External Client App Manager in the salesforce setup menu.
Find the App named BookMe External Client App, click edit policies, find the OAuth Policies section, Click Enable Client Credentials Flow and add a user that can be used for integration.
When this is done, go to the BookMe Management UI, and navigate to the Admin –> CRM –> CRM Configuration tab within the Management UI.
Here, the domain name of the salesforce org must be entered. Click save, and then test the connection, by clicking the Test button on the Test CRM Connection card.
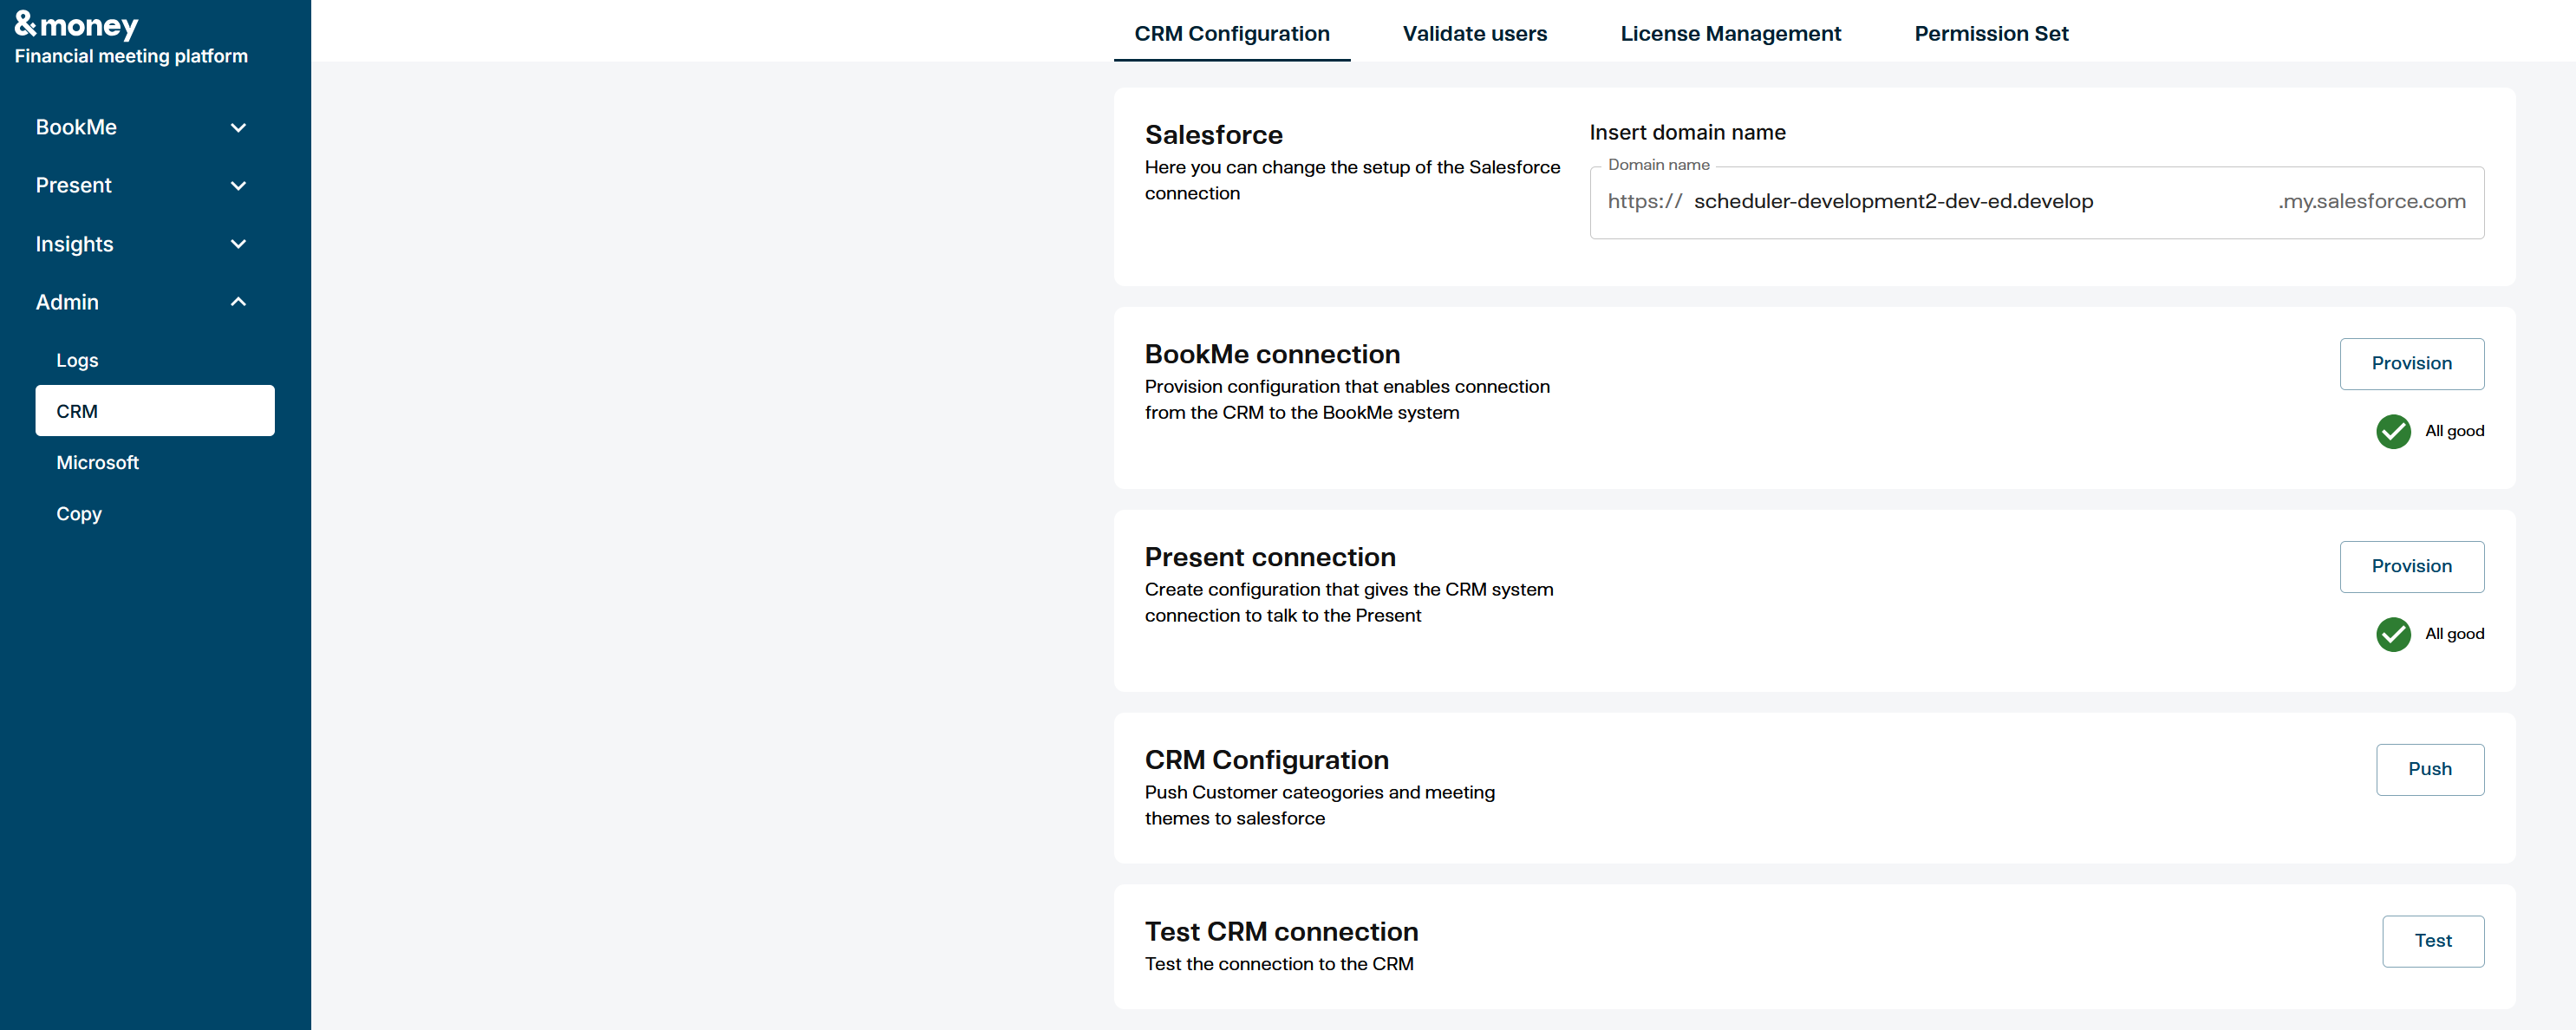
If the connection is successful, the backend is now connected to the Salesforce org. Now, the org must be connected to the backend.
On the same page in the Management UI, click the Provision button on the Present connection card.
If this card shows a warning with missing credentials, contact &money for assistance.
When the Provision button is clicked, credentials are pushed to the Salesforce org, Remote Site Settings, Auth. Providers, and Named Credentials are created automatically.
The final step is to navigate to the newly created Named Credentials in the Salesforce org, and test the authentication to the backend,
by editing and saving the Named Credential, with the Start Authentication Flow on Save checkbox checked.
If all goes well, the org is now connected to the Present backend, and Present is ready to be used.